There are so many possibilities with Creative DRAWings® that it is almost impossible to know how every tool functions. We will try to shed some light on how to better use the basic tools and uncover some little known facts that will make your designing easier and more professional.
Have you ever wondered what the difference between Group and Combine is in Creative DRAWings® Embroidery Software? Both are powerful tools found on the Right click menu.
Watch this short video to find out what they are and how they can be used.
http://www.youtube.com/watch?v=KLGrX9IvdOQ
Creative DRAWings® lets you choose Grid placement and Snap to Grid functions.
There are two ways to add grid lines. Either left click in the top or left ruler and drag a new grid line to the position you wish. Or right click in the ruler bar to add a horizontal, vertical or diagonal grid line.
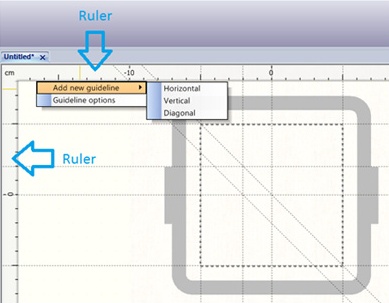

You can change the Guideline options. Simply Right click on a Ruler Bar and then choose Guideline options. If you want your embroidery to snap to your
gridlines as you move the design, make sure that the Snap enabled is checked. See page 118 in your Creative DRAWings® manual for more information.
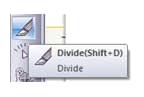
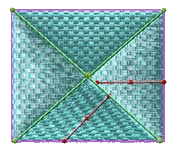
The Divide tool only applies to satin and piping (or Row fill) areas.
To create multiple directions of stitches in a step fill area, first change the area to a Satin area. Then use the Divide tool to “cut up” the satin area. Once the area is divided, you can add a pattern to the area. The pattern will follow the satin directions.
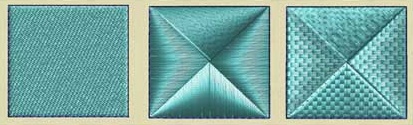
If you don’t like the direction of the pattern, use the Direction tool to adjust.
Creative DRAWings® automatically sets Step Fill and Satin density depending upon what fabric type you choose. Here you can download a lesson showing the settings for the different fabrics you may choose, in PDF format. Automatic Density Settings.
You can change the type of running stitch (single, double or triple) just by changing the Outline parameter in the Tool options.

First, make sure that your measurement options are in metric. To do this, go to Tools on the main toolbar. Go to Options. On the General tab, choose Measurement system Metric.
 When you choose a running border in your design, notice the Outline parameter of the Tool Options.
Now look at the Object Properties tab. On the pen or border tab, see the Running option chosen. Under Styles, either None “X”, Double or Triple is highlighted.
Change the Outline Parameter to a new setting (use the above guidelines). Enter and see the change in the design as well as in the Object Properties. Try several settings and watch the changes.